
How to Update Your Kitchen with Simple Design Changes
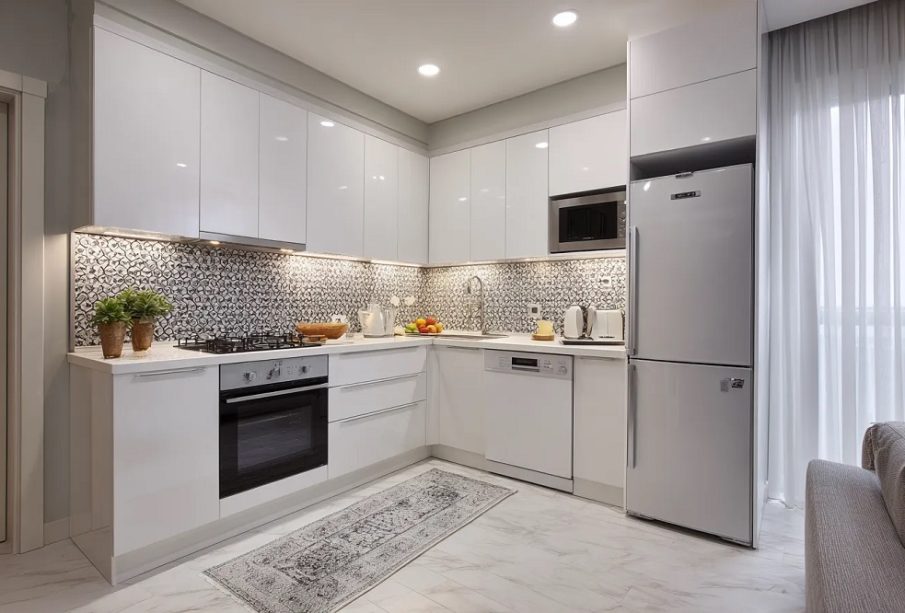
The kitchen is often described as the programmatic heart of the modern home. Because it functions as a high-traffic hub for meal preparation, casual dining, and family gatherings, it is also the room that experiences the fastest visual and physical wear. Over time, cabinet finishes fade, hardware styles shift, and lighting setups can begin to feel dated.
Many homeowners believe that the only way to modernize a kitchen is to commit to a complete, down-to-the-studs architectural demolition. However, full-scale renovations require significant upfront capital, municipal building permits, and weeks of stressful domestic disruption.
Substantial, high-impact transformations can be achieved through low-cost, targeted aesthetic adjustments. By focusing on surface finishes, hardware configurations, and strategic lighting layouts, you can dramatically elevate your kitchen’s design language without altering its footprint. This guide provides a comprehensive roadmap to refreshing your space using simple, highly accessible design modifications.
Transforming Cabinetry with Paint and Hardware
Cabinetry occupies the largest physical and visual surface area in any kitchen layout. If your current cabinets are structurally sound but look dated due to worn wood stains or faded laminate surfaces, targeted cosmetic updates can deliver a complete transformation.
The Art of Cabinet Refacing via Paint
Painting existing cabinets is one of the most cost-effective home improvement strategies available. The secret to a professional-grade finish lies entirely in the labor-intensive preparation phase rather than the actual application of the topcoat.
-
Deconstruction and Cleaning: Remove all cabinet doors, drawer fronts, and metallic hinges. Scrub every wooden surface with a heavy-duty degreaser like trisodium phosphate to remove years of cooking oils, fingerprints, and embedded grime.
-
Sanding and Priming: Lightly sand the surfaces to scuff the existing clear coat, providing mechanical traction for the new layer. Apply a high-quality, oil-based or shellac-based bonding primer to seal the wood grain and prevent natural tannins from bleeding through.
-
Selecting the Right Topcoat: Apply two coats of a specialized cabinet enamel paint, utilizing a high-density foam roller or a paint sprayer to eliminate visible brush strokes. Opt for modern neutrals like warm greige, soft off-white, or deep charcoal gray to establish a sophisticated background canvas.
Modernizing with Architectural Hardware
Swapping out outdated cabinet hardware is a minor structural modification that yields immediate aesthetic dividends. Replacing worn brass knobs or basic wooden pulls with contemporary alternatives alters the silhouetted profile of your cabinetry.
-
Evaluating Hole Spacing: If you are replacing existing handles, measure the exact center-to-center distance between the screw holes. Matching this dimension allows you to install new hardware without drilling new holes or filling old ones.
-
Embracing Contemporary Finishes: Look for clean-lined hardware options in matte black, brushed gold, or satin nickel. Linear T-bar pulls create a sleek, modern architectural feel, while classic bin pulls provide a timeless, transitional farmhouse charm.
Elevating the Backsplash and Wall Planes
The backsplash occupies the critical eye-level zone located directly between the countertop and the upper cabinets. This vertical plane serves as a natural focal point, meaning even minor structural changes here will redefine the mood of the entire room.
Implementing Accessible Backsplash Solutions
Traditional tile backsplashes require specialized wet saws, mortar, and messy grout applications. Modern material innovations provide highly accessible alternatives for amateur do-it-yourselfers.
-
High-Quality Peel-and-Stick Tile: Modern self-adhering tiles utilize advanced polyurethane or composite formulations that realistically mimic the texture, weight, and light reflectance of authentic ceramic, marble, or metal. They feature heavy-duty, moisture-resistant adhesives that bond permanently to clean, flat drywall surfaces.
-
The Beadboard Alternative: For a classic cottage or traditional aesthetic, install paintable wood or cellular PVC beadboard panels directly over a dated backsplash wall. Seal the edges with a waterproof silicone caulk to protect the material from water splashes behind the sink.
Refreshing Peripheral Wall Spaces
Kitchen walls frequently suffer from grease buildup and scuffs. Repainting peripheral wall spaces with a scrubbable, semi-gloss or satin latex paint keeps the room looking hygienic and bright. Ensure you select a wall tone that complements the undertones of your newly painted cabinets and existing countertops to maintain design continuity.
Illuminating the Workspace with Strategic Lighting
Poor lighting design can make an expensive kitchen look gloomy, cramped, and institutional. Many older homes rely exclusively on a singular, centered fluorescent ceiling fixture that casts harsh, flattening shadows over active prep zones. Upgrading your lighting strategy involves layering different types of light.
Introducing Under-Cabinet LED Systems
Under-cabinet lighting is an essential element that elevates the perceived value of a kitchen instantly. It eliminates the shadows cast by upper cabinets, illuminating the dark workspaces along the back of the countertop.
-
Plug-In LED Tape Lights: High-output LED tape light rolls feature low-profile profiles and adhesive backs, allowing them to hide seamlessly behind the lower lip of upper cabinets. Many modern systems plug directly into standard wall outlets and connect wirelessly to motion sensors or smart-home dimmer apps.
-
Color Temperature Precision: When selecting LED systems, prioritize a consistent color temperature. Look for bulbs rated between 2700K and 3000K to provide a warm, inviting residential glow. Avoid cool-white bulbs rated above 4000K, as they can make a kitchen feel like a sterile commercial laboratory.
Upgrading Decorative Ceiling Fixtures
Replace generic center-room dome lights with contemporary flush-mount or semi-flush-mount fixtures that express your personal style. If your kitchen features an island or a peninsula counter, hanging a pair of modern pendant lights with glass or woven shades introduces a dramatic vertical element that defines the space beautifully.
Modernizing Plumbing Fixtures and Open Storage
Minor mechanical swaps can improve both the daily efficiency and visual style of your food preparation zones.
Upgrading the Primary Faucet
The kitchen faucet is used dozens of times a day, making it a natural centerpiece of the sink station. Swapping a leaking, basic dual-handle faucet for a high-performance modern model combines utility with aesthetics.
-
Gooseneck Pull-Down Models: High-arc gooseneck faucets provide ample clearance for washing deep stockpots and commercial baking sheets. Opt for models featuring integrated pull-down spray wands and magnetic docking mechanisms.
-
Finish Alignment: Match the metal finish of your new faucet to the secondary accent metals inside the room, or contrast it sharply against a light countertop using a bold matte black finish.
Transitioning to Functional Open Shelving
If your kitchen feels heavy or claustrophobic due to an abundance of dark upper cabinetry, consider removing one or two non-essential cabinet units and replacing them with thick, floating wooden shelves.
Open shelving breaks up monotonous rows of cabinetry, allowing you to display texturally rich items like ceramic mixing bowls, daily coffee mugs, and matching spice jars. To prevent this area from looking cluttered, keep the displayed items limited to a cohesive color palette and ensure they are pieces you use frequently to avoid dust accumulation.
Frequently Asked Questions
What is the difference between a cabinet enamel paint and standard wall paint regarding durability?
Cabinet enamel paint is formulated with specialized acrylic, alkyd, or polyurethane resins that cure into an exceptionally hard, impact-resistant shell. This chemical composition allows the cured surface to withstand frequent scrubbing, bumping, moisture exposure, and the corrosive oils found on human hands without softening or peeling. Standard wall paint lacks these heavy-duty hardening resins, meaning it remains flexible and porous, making it prone to rapid wearing, chipping, and staining if applied to high-friction cabinetry surfaces.
How can I update a dated laminate countertop without paying for full stone replacement?
You can update a laminate countertop economically using a specialized multi-coat countertop refinishing kit or a high-grade epoxy coating system. These kits typically include a liquid primer, mineral colored flakes to mimic the organic pattern of granite or quartz, and a clear, high-gloss topcoat that seals the surface against moisture and impacts. Alternatively, you can install a custom wood counter directly over the existing laminate using thick butcher-block panels, provided you seal the wood thoroughly around the sink cutouts.
Why is a grain filler necessary when painting open-grain wood cabinets like oak?
Oak is an open-grain hardwood characterized by deep, porous valleys and textured ridges throughout its wood structure. If you apply paint directly over raw oak, the liquid will sink into these microscopic pores, leaving behind a pitted, uneven texture that clearly reveals the underlying wood grain despite multiple coats of paint. Applying a specialized paste grain filler across the sanded wood profile before priming fills these voids, creating a perfectly flat, glass-smooth surface that mimics the uniform appearance of manufactured medium-density fiberboard.
How do I clean and prep a tiled backsplash wall before applying peel-and-stick tiles?
To ensure a permanent adhesive bond, you must completely remove all surface contaminants. Scrub the existing tile backsplash with a mixture of warm water and a heavy-duty degreaser or rubbing alcohol to strip away airborne cooking grease, soap scum, and dust. Wipe the surface down with clean water to remove chemical residues, and allow the wall to dry completely for twenty-four hours. If the old tile grout lines are exceptionally deep or uneven, apply a thin layer of joint compound to smooth out the surface profile before sticking the new tiles down.
What are the pros and cons of utilizing a single-handle faucet versus a traditional double-handle faucet?
A single-handle faucet offers superior daily functionality because it allows you to control both water temperature and flow rate using a single hand or the back of a wrist, which is highly efficient when your hands are dirty from food preparation. It also requires only a single hole penetration through the sink deck, making it easier to clean around the base. The main drawback is that if the internal ceramic mixing cartridge fails, you lose access to both hot and cold water simultaneously, whereas a double-handle faucet allows you to isolate a single valve failure.
How can I determine if my upper kitchen cabinets are safe to remove for an open shelving project?
Standard upper kitchen cabinets are modular units hung independently by heavy-duty wood screws driven directly through the cabinet back rails into the vertical wall studs behind the drywall. They are not structural load-bearing elements. To verify safety, inspect the interior of the cabinet to locate the mounting screws and check if the cabinet frame is structurally tied to adjacent units. If the cabinets contain integrated electrical under-cabinet wiring or housing for ventilation ductwork, you will need to safely reroute those utilities before removal.
Why should a homeowner consider installing a wireless light dimmer switch during a kitchen refresh?
Installing a dimmer switch allows you to alter the ambient mood and perceived energy of the kitchen instantaneously. High-intensity lighting is necessary for safe chopping and meal prep, but it can feel harsh and uninviting when hosting guests or eating early morning breakfasts. A dimmer switch gives you the flexibility to lower the lumen output of your central ceiling lights or pendant fixtures, transforming the room from a bright workspace into a soft, intimate dining environment while reducing overall household energy consumption.


