The Ultimate Guide to Building Your Dream Home
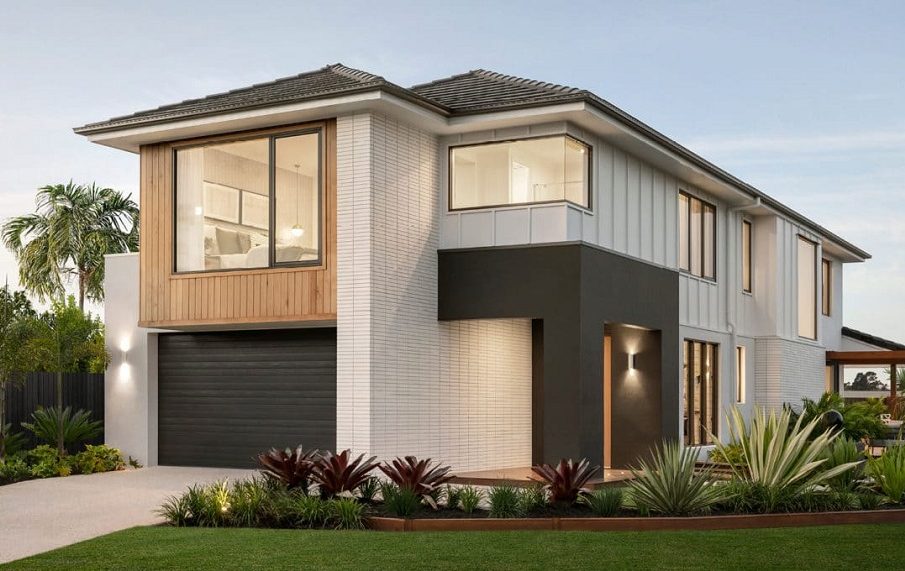
Building a custom home is one of the most rewarding yet complex undertakings a homeowner can experience. Unlike purchasing an existing property, constructing a house from the ground up gives you complete creative control over the layout, architectural style, materials, and smart technologies. It allows you to tailor your living space precisely to your current lifestyle while anticipating your future needs.
However, translating a vision into a physical structure requires months of planning, financial discipline, and close collaboration with a team of professionals. Without a structured approach, the custom home building process can easily lead to blown budgets, scheduling delays, and unwanted compromises. This comprehensive guide outlines the essential phases of building your dream home, providing strategic insights to ensure your project finishes successfully, on time, and within budget.
Phase One Establishing the Financial Foundation
Before looking at floor plans or touring potential lots, you must establish a realistic financial framework. Miscalculating the true cost of construction is the primary reason custom home projects stall or experience severe design cutbacks.
Setting a Realistic Total Budget
Your total budget involves much more than just the hard construction costs of lumber, concrete, and labor. A comprehensive budget must account for every expense associated with the project.
-
Land Acquisition: The purchase price of the plot, plus closing costs, title insurance, and broker fees.
-
Soft Costs: Professional fees for architects, structural engineers, interior designers, land surveyors, and local building permit departments.
-
Site Preparation: Cleared trees, rock excavation, soil stabilization, grading, and bringing utilities like water, electricity, and sewage to the building pad.
-
Hard Construction Costs: The actual labor and material costs required to build the physical shell and finish the interior of the home.
-
Contingency Fund: A critical reserve of at least fifteen percent of the total project cost to absorb unexpected expenses, such as poor soil conditions or material price fluctuations.
Securing Construction Financing
Financing a custom home build differs significantly from obtaining a traditional conventional mortgage. You will generally need a construction-to-permanent loan. This type of financing holds the funds in an escrow account, allowing the bank to release money directly to the builder in stages, known as draws, as specific construction milestones are achieved. Once the home passes its final inspection, the loan automatically converts into a standard long-term mortgage.
Phase Two Selecting the Ideal Location
The old real estate adage location, location, location carries immense weight when building a custom home. While you can always remodel a kitchen or expand a bedroom later, you cannot change the geographic position or physical constraints of your land.
Assessing Lot Workability and Topography
A beautiful view can sometimes mask severe structural challenges. Before closing on a piece of land, conduct thorough due diligence to ensure the lot is physically buildable.
-
Soil Quality and Compaction: Hire a geotechnical engineer to perform a soil boring test. Expansive clay or loose sandy soil requires specialized, expensive foundation engineering to prevent the house from settling unevenly over time.
-
Topography and Slope: Building on a steep incline can offer stunning views, but it dramatically increases the cost of foundation walls, retaining structures, and engineered drainage systems.
-
Utility Accessibility: If the lot is rural, determine if municipal water and sewer lines are available. If not, you must factor in the substantial costs of drilling a deep well and installing a private septic system.
Zoning and Environmental Restrictions
Review all local zoning ordinances, building codes, and neighborhood covenants. Homeowners association guidelines frequently dictate the minimum and maximum square footage of the home, allowable exterior siding materials, roof pitch requirements, and even specific paint colors. Additionally, verify that the plot does not overlap protected wetlands or designated flood zones, which can heavily restrict your building footprint.
Phase Three Assembling Your Expert Core Team
Building a home requires specialized technical expertise. Selecting the right team members will determine whether your construction process is smooth and collaborative or stressful and fragmented.
The Architect vs the Designer
An architect holds a professional degree and state licensing, specializing in spatial design, structural integrity, and local building codes. They excel at creating complex, entirely custom architectural forms from scratch. If your project features a straightforward layout, you may choose a certified residential designer instead, who can customize pre-designed stock blueprints for a lower fee.
Selecting the Right General Contractor
The general contractor manages the daily operations on the construction site, hires subcontractors, schedules material deliveries, and interfaces with building inspectors.
-
Verify Credentials: Ensure the builder is fully licensed, carries comprehensive general liability insurance, and maintains active workers compensation coverage for their crew.
-
Check Local References: Request a list of past clients who built homes with the contractor three to five years ago. Ask these homeowners how the builder handled warranty items and if the house has performed well over time.
-
Analyze Contract Structures: Decide between a cost-plus contract, where you pay the actual material costs plus a fixed percentage fee to the builder, or a fixed-price contract, which locks in a set price for the entire build based on detailed initial specifications.
Phase Four Designing for Functionality and Longevity
When working with your architect to draft floor plans, prioritize daily functionality over passing design trends. A truly custom home should be engineered to serve your household across multiple stages of life.
Emphasizing Smart Flow and Spatial Zoning
Consider how your family moves through a space over a twenty-four-hour period. Position bedrooms away from high-traffic, noisy areas like the kitchen, laundry room, or home theater.
-
Mudroom Transitions: Design a spacious entry point connecting the garage to the main house to capture shoes, coats, and backpacks before they clutter the living areas.
-
Flex Spaces: Include rooms that can easily adapt over time, such as a home office that can transition into a main-floor guest suite as mobility needs change.
Designing for Energy Efficiency
Integrating energy-efficient concepts during the initial design phase saves thousands of dollars in annual utility costs and enhances indoor comfort.
-
Passive Solar Orientation: Orient the long axis of the home to face south, maximizing natural winter daylight while utilizing roof overhangs to block intense, direct summer sun.
-
Advanced Framing Techniques: Utilize six-inch exterior wall framing instead of traditional four-inch framing to allow for thicker insulation values, creating a tighter thermal envelope.
Phase Five Navigating the Construction Milestones
Once the permits are issued, the construction phase officially begins. Understanding the sequence of events allows you to track progress accurately and prepare for your selections.
Foundation and Framing
The builder clears the site, excavates the dirt, and pours the concrete foundation, whether a slab, crawlspace, or full basement. Next comes framing, where the structural skeleton of the house is erected. Seeing the walls go up provides the first true sense of the home’s scale and view corridors.
Rough-Ins and Mechanical Systems
Once the roof shingles and exterior house wrap protect the structure from rain, subcontractors install the hidden infrastructure. This includes routing plumbing pipes, electrical wiring, HVAC ductwork, and smart-home networking cables through the open wall studs. This is your last chance to verify light switch placements and outlet locations before the drywall seals the walls shut.
Interior Finishes and Handover
Drywall installation is followed by finish carpentry, which includes installing doors, trim, kitchen cabinets, and bathroom vanities. Next, flooring, tile backsplashes, and countertops are secured. The project concludes with a final inspection by the local municipality to secure a certificate of occupancy, allowing you to move in legally.
Frequently Asked Questions
What is a mechanics lien, and how can I protect myself from it during construction?
A mechanics lien is a legal claim placed against your property by a subcontractor or material supplier who was not paid by your general contractor. Even if you paid your general contractor in full, if they fail to pay their suppliers, you could be held financially responsible. To protect yourself, require your general contractor to provide signed lien waivers from all major subcontractors and material suppliers before making each draw payment.
How does a design-build firm differ from the traditional hiring process?
In the traditional process, you hire an architect independently to draw the plans, then put those plans out to bid with various general contractors. With a design-build firm, the architect, designers, and construction crew all work for the same unified company under one roof. This single-source responsibility minimizes communication errors, streamlines the project timeline, and ensures the design aligns with your budget right from the start.
What are building allowances, and why do they frequently cause budget overruns?
An allowance is a specific dollar amount allocated in the construction contract for items that have not been selected yet, such as light fixtures, flooring, or appliances. Builders often insert low, basic-grade allowances to make their overall bid look cheaper. When you visit a showroom and select higher-quality items, you must pay the price difference as a change order, which quickly drives up the total cost of the project.
What is the difference between a plat map and a plot plan?
A plat map is a large public record map created by a surveyor that shows how an entire piece of land is subdivided into distinct lots, streets, and common areas within a county or neighborhood. A plot plan, or site plan, is a specific architectural drawing showing your individual house positioned on your exact lot, detailing the precise distances from the building foundation to the property boundary lines, utility easements, and setbacks.
Why is a pre-drywall walk-through considered a critical step for the homeowner?
The pre-drywall walk-through takes place after the framing, plumbing, electrical, and HVAC rough-ins are complete but before the insulation and drywall are hung. This is the only time you can inspect the internal components of your walls. It allows you to double-check that electrical outlets, network jacks, cable connections, plumbing valves, and structural blocking for heavy items like wall-mounted televisions are placed exactly where you intended.
What is a punch list, and when should it be completed?
A punch list is a detailed inventory compiled near the end of construction that notes all minor structural, cosmetic, or mechanical defects that the builder must fix before final payment is released. This includes items like scratched paint, loose trim, uncaulked joints, or sticky cabinet drawers. The punch list is generated during a thorough walk-through with the contractor right before the official handover of the keys.
How does an engineered wood I-joist compare to traditional dimensional lumber for floor framing?
Engineered wood I-joists are manufactured using top and bottom wood flanges bonded to a central oriented strand board web. They are stronger, lighter, and can span much longer distances without intermediate supporting posts than traditional solid wood joists. Furthermore, engineered joists are perfectly straight and dimensionally stable, meaning they resist warping, shrinking, and twisting, which results in flatter floors and prevents floor squeaks over time.